部署方案
部署前的资料准备
需要准备资料可以查看《开发前资料准备》
原始部署方案
本系统建议系统环境为Centos7.9,在资料准备中我们购买了Centos7.9 4H16G 200G的云服务器,如AWS则通过创建实例的时候生成的登录密钥进行远程访问,如果预算充足,可以将服务器拆分为应用服务器、设备服务器、数据库服务器和备份服务器,分别部署第三方程序到对应服务器下;
数据库服务器
- Clickhouse
- MySQL
- Redis
设备服务器
- VerneMQ
应用服务器:
- Nginx
- Zipkin
- Etcd
- etcdkeeper
- Nats
- Prometheus
- XXL-JOB
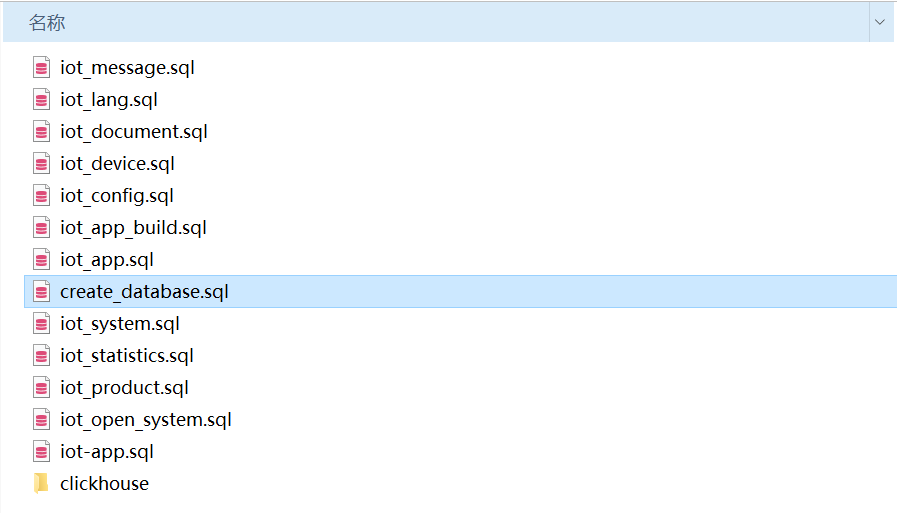
数据库初始化
我们准备了Clickhouse、MYSQL数据库脚本,先创建数据库再执行脚本即可;脚本中已内置系统运行所需要的初始化数据;
代码&执行文件获取
部分开源代码和完整私有云可执行文件已上传到Github,通过Git将执行程序下载到应用服务器,通过启动shell脚本执行运行,再执行之前注意先调整配置文件的参数;
程序下载
#下载服务程序
git clone https://xxxxx.com/aitihings

#设置权限
chmod a+x iot-*

ll
-rwxr-xr-x  1 root root   69029888 12月 21 10:39 iot-app-api-service
-rwxr-xr-x  1 root root   55803304 12月 15 10:10 iot-app-message-service
-rwxr-xr-x  1 root root   67381352 12月 20 10:00 iot-app-oem-service
-rwxr-xr-x  1 root root   45102152 12月 15 10:07 iot-auth-service
-rwxr-xr-x  1 root root   53261896 12月 15 09:58 iot-basic-service
-rwxr-xr-x  1 root root   76361728 12月 15 17:35 iot-cloud-api-service
-rwxr-xr-x  1 root root   32043008 12月 15 10:13 iot-device-job-service
-rwxr-xr-x  1 root root   83795000 12月 15 16:16 iot-device-service
-rwxr-xr-x  1 root root   52433256 12月 15 09:58 iot-document-service
-rwxr-xr-x  1 root root   61913352 12月 15 09:57 iot-intelligence-service
-rwxr-xr-x  1 root root   48097032 12月 15 10:06 iot-ip-service
-rwxr-xr-x  1 root root   57441576 12月 15 10:14 iot-job-service
-rwxr-xr-x  1 root root   55310824 12月 15 10:14 iot-language-service
-rwxr-xr-x  1 root root   48706344 12月 15 10:17 iot-log-service
-rwxr-xr-x  1 root root    8544256 12月 15 10:10 iot-mqtt-data-service
-rwxr-xr-x  1 root root   61023464 12月 15 10:09 iot-mqtt-service
-rwxr-xr-x  1 root root   53685256 12月 15 10:18 iot-oauth-service
-rwxr-xr-x  1 root root   58174600 12月 15 10:00 iot-open-system-service
-rwxr-xr-x  1 root root   59979368 12月 15 10:05 iot-oss-service
-rwxr-xr-x  1 root root   63470856 12月 16 13:08 iot-product-service
-rwxr-xr-x  1 root root   64854376 12月 15 10:17 iot-statistics-service
-rwxr-xr-x  1 root root   57182440 12月 15 10:04 iot-sys-notifier-service
-rwxr-xr-x  1 root root   60156968 12月 15 09:56 iot-system-service
-rwxr-xr-x  1 root root   56338280 12月 21 10:39 iot-user-service
-rwxr-xr-x  1 root root   49309736 12月 15 10:03 iot-weather-service
配置文件
配置文件为yaml文件,支持配置web、数据库、Redis、OSS、消息队列Nats、Zipkin、etcd、jwt、mqtt等配置信息;
#Web配置
service:
  httpAddr: 0.0.0.0:31002 #API自动端口
  httpqps: 100000  #支持运行时动态调整
  IPLimitRequest: 5000 #IP限流
  logfile: "./logs/iot-app-api-service.log" #日志文件存储,50M之后自动备份,7天自动删除
  loglevel: "debug" #日志级别配置

#数据库配置
database:
  database: xxxxxx
  driver: mysql
  connstr: root:123456@tcp(127.0.0.1:3306)/iot_device?charset=utf8mb4&parseTime=True&loc=Local

#Redis配置
redis:
  Cluster: false
  Addrs: ["127.0.0.1:6379"]
  Username:
  Password: "123456"
  Database: 0
  MinIdleConns: 5
  IdleTimeout: 600
  PoolSize: 50
  MaxConnAge: 3600

#OSS配置(目前支持qiniu、ali、s3,进入相应平台获取accessKey)
oss:
  useOss: "qiniu"
  qiniu:
    Endpoint: ""
    AccessKeyID: ""
    AccessKeySecret: ""
    BucketName: ""
  ali:
    Endpoint: ""
    AccessKeyID: ""
    AccessKeySecret: ""
    BucketName: ""
  s3:
    Endpoint: ""
    AccessKeyID: ""
    AccessKeySecret: ""
    BucketName: ""
    Region: "cn-north-1"

#消息队列配置
NATS:
  addrs: ["nats://nat123456@127.0.0.1:4222"]

################### 以下是微服务治理配置 ####################
zipkin:
  url: http://127.0.0.1:9411/api/v2/spans

etcd:
  address: ["127.0.0.1:2379"]
  username: ""
  password: ""


# jwt密钥配置
AppJwt:
  SigningKey: "test.AppJwt"
  AccessTokenTTL: 604800
  RefreshTokenTTL: 608400  #RefreshTokenTTL 要配置为大于 AccessTokenTTL的时间

#MQTT配置
MQTT:
  addrs: ["tcp://127.0.0.1:1885"]  #如果是集群部署,请配置一个地址
  clientid: "svr_iot-mqtt-service.test"
  user: "testmqttservice"
  password: "23423e88c008b77348de63ee40ed8532"
  offline: false   #指定掉线时要不要发遗嘱消息
  CacheControl:
    Register: 600 #单位:秒
    Publish: 600 #单位:秒
    Subscribe: 600 #单位:秒
微服务运行
# 检查&运行
chmod a+x check.sh
./check.sh

ps -ef |grep iot-
root     11486     1  1 12月16 ?      02:38:24 /opt/bat/iot-device-service
root     11900     1  1 12月16 ?      02:36:24 /opt/bat/iot-product-service
root     20006     1  0 12月15 ?      00:08:33 /opt/bat/iot-system-service
root     20182     1  0 12月15 ?      00:09:10 /opt/bat/iot-intelligence-service
root     20338     1  0 12月15 ?      00:08:06 /opt/bat/iot-document-service
root     20488     1  1 12月15 ?      03:03:44 /opt/bat/iot-basic-service
root     20840     1  0 12月15 ?      00:08:32 /opt/bat/iot-open-system-service
root     21459     1  0 12月15 ?      00:08:47 /opt/bat/iot-weather-service
root     21614     1  6 12月15 ?      11:13:14 /opt/bat/iot-sys-notifier-service
root     21801     1  0 12月15 ?      00:08:24 /opt/bat/iot-oss-service
root     21870     1  0 12月21 ?      00:03:12 /opt/bat/iot-cloud-api-service
root     21980     1  0 12月15 ?      00:08:24 /opt/bat/iot-ip-service
root     22068     1  1 12月21 ?      00:35:44 /opt/bat/iot-app-api-service
root     22142     1  0 12月21 ?      00:01:38 /opt/bat/iot-user-service
root     22171     1  0 12月15 ?      00:08:44 /opt/bat/iot-auth-service
root     22488     1  0 12月15 ?      00:09:13 /opt/bat/iot-mqtt-service
root     22561     1  1 12月15 ?      03:20:01 /opt/bat/iot-mqtt-data-service
root     22760     1  0 12月15 ?      00:09:20 /opt/bat/iot-app-message-service
root     23225     1  0 12月15 ?      00:01:00 /opt/bat/iot-device-job-service
root     23358     1  1 12月15 ?      03:02:22 /opt/bat/iot-job-service
root     23541     1  0 12月15 ?      00:09:09 /opt/bat/iot-language-service
root     23829     1  0 12月15 ?      00:09:42 /opt/bat/iot-statistics-service
root     23995     1  0 12月15 ?      00:09:24 /opt/bat/iot-log-service
root     24156     1  0 12月15 ?      00:10:17 /opt/bat/iot-oauth-service
部署web
web站点包括云管理平台、开发平台,平台代码开源,通过Cloud Github、Open Github进行下载。
#获取代码
git clone https://cloud
git clone https://open

#编译云管平台
cd cloud
npm run build

#编译开发平台
cd open
npm run build
将web编译文件路径配置到Nginx中
云管平台
准备好云管平台的域名证书,将证书填入到ssl_certificate、ssl_certificate_key,在将上一步骤编译的web路径配置到location /, locationn /api代理iot-cloud-api-service服务
server {
       listen 2888 ssl;
       server_name  Localhost;
       add_header X-XSS-Protection 1;
       add_header X-Content-Type-Options "nosniff";

       ssl_certificate /opt/xxxxxx/cert/cloud/server.pem;
       ssl_certificate_key /opt/xxxxxx/cert/cloud/server.key;
       ssl_session_cache    shared:SSL:1m;
       ssl_session_timeout  5m;
       ssl_ciphers  HIGH:!aNULL:!MD5;
       ssl_prefer_server_ciphers  on;

       location / {
             root /opt/xxxxxx/open/iot-platform-web;
             #解决404
             try_files $uri $uri/ /index.html;
       }
       location /api {
             proxy_set_header Host $host;
             proxy_set_header X-Real-IP $remote_addr;
             proxy_set_header X-Forwarded-For $proxy_add_x_forwarded_for;
             proxy_buffering off;
             rewrite ^/api/(.*)$ /$1 break;
             proxy_pass http://127.0.0.1:31001;
       }
}
开发平台访问
准备开发平台的域名和证书,如果需要试用自办法证书可以考虑acme、certbot,如云管平台配置一样将证书填入到ssl_certificate、ssl_certificate_key,在将上一步骤编译的web路径配置到location /, locationn /api代理iot-cloud-api-service服务
location /: 为开发平台的web地址
location /api:为代理开发平台访问接口
location /.well-known/apple-app-site-association:为第三方登录授权访问地址
location /mqtt:代理MQTT WebSocket服务
server {
       listen 2887 ssl;
       server_name  Localhost;
       add_header X-XSS-Protection 1;
       add_header X-Content-Type-Options "nosniff";

       ssl_certificate /opt/xxxxxx/cert/cloud/server.pem;
       ssl_certificate_key /opt/xxxxxx/cert/cloud/server.key;
       ssl_session_cache    shared:SSL:1m;
       ssl_session_timeout  5m;
       ssl_ciphers  HIGH:!aNULL:!MD5;
       ssl_prefer_server_ciphers  on;

       location / {
           root /opt/xxxxxx/cloud/iot-open-web;
           #解决404
           try_files $uri $uri/ /index.html;
       }

       location /api {
           proxy_set_header Host $host;
           proxy_set_header X-Real-IP $remote_addr;
           proxy_set_header X-Forwarded-For $proxy_add_x_forwarded_for;
           proxy_buffering off;
           rewrite ^/api/(.*)$ /$1 break;
           proxy_pass http://127.0.0.1:31001;
       }
       location /.well-known/apple-app-site-association {
           proxy_set_header Host $host;
           proxy_set_header X-Real-IP $remote_addr;
           proxy_set_header X-Forwarded-For $proxy_add_x_forwarded_for;
           proxy_buffering off;
           rewrite ^/api/(.*)$ /$1 break;
           proxy_pass http://127.0.0.1:31001/.well-known/apple-app-site-association;
       }
       location /mqtt {
           proxy_pass http://127.0.0.1:8883/mqtt;
           proxy_set_header   Host             $host;
           proxy_set_header   X-Real-IP        $remote_addr;
           proxy_set_header   X-Forwarded-For  $remote_addr;
           proxy_set_header   X-Forwarded-Proto http;
           proxy_http_version 1.1;
           proxy_set_header Upgrade $http_upgrade;
           proxy_set_header Connection "upgrade";
       }
}
云管平台:https://{域名}:2888 admin/Aa123456 开发平台:https://{域名}:2887 注册账号